Monday, February 25, 2013

Authentic Italian Red Sauce a la Bean Pot!


Here we go guys! You are absolutely going to love this sauce! The Bean pot's special. It's not a crock pot. Let me repeat. It is not a crock pot! LOL! For those of you who are reading, who don't have a bean pot, Let me explain. It can be a slow cooker or not! It goes into the oven or can be used for cold salads. It stays cold or hot for a very long time outside of the oven and refrigerator. Which makes it great for parties and is easily transportable! It's also microwave and dishwasher safe! Beyond that, there's something special about the bean pot that cooks your food in an amazing way. I have been making my Italian red sauce for over 20 years in a crock pot and there is a distinct difference in the flavor cooking with the bean pot vs. the crock pot. The sauce comes out much richer. I'm full blooded Italian, and I can say, this sauce is the bomb! Now, don't take my word for it, try it yourself! But please, cook it in a bean pot! I promise you won't be disappointed!  Get your bean pot here!

So let's get on with the recipe shall we?

Ingredients:
*Put the following ingredients into the bean pot!
-1 28 oz can of crushed tomatoes
-1 28 oz can of tomato sauce
-1 small can of tomato paste
-1 pound ground sausage. I prefer mild. You can experiment and use hot. I like johnsonville sausage best! Brown the sausage in a frying pan before you place it into the bean pot.

More Ingredients:
*Put these ingredients into a food processor. Do not puree them. Give them a few pulses so they are chopped into small pieces and place them into the bean pot!
-1/2 red pepper
-1/2 green pepper
-1/2 yellow or orange pepper
-1/2 jalapeno pepper. If you like it spicy you can put the entire pepper in. Make sure you seed it.
-2 Leeks - They are a milder version of onions.
-1 handful fresh basil
-1 handful fresh parsley
-4 fresh garlic cloves

Now you're ready! Isn't that easy?  Preheat the oven to 350 degrees. Put the top on the bean pot and place it in the oven to cook for 4 hours.

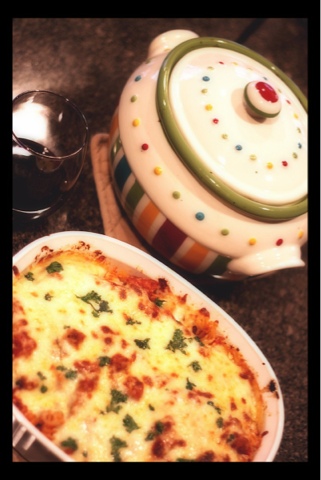
Of course you can use the sauce for spaghetti or whatever type of pasta you prefer. I made baked ziti here and it's delicious and easy! After the sauce is finished cooking, you do the following if you choose to make ziti.

-place cooked ziti in a casserole dish put two table spoons of butter in and mix until blended.
-top with your sauce and mix it into the ziti so it's well coated.
-place a thicker layer of sauce on top of the ziti.
-finish with grated Mozzarella cheese, some fresh Parmesan and a few parsley leaves. Then place it in an oven at 450 degrees until the top has browned! If you like, you can also add a layer of ricotta cheese before putting the thicker sauce on top! Sometimes I do, sometimes I don't! That's the fun part about cooking!

So, I hope you enjoy this family recipe and keep it in your heart, on your table and in your cupboard for years to come! Let me know how you like the bean pot too!

Grace


Thursday, February 21, 2013

HELP from Seasoned BLOGGERS (Pretty Please)

I'm new to blogging! Help, I need input! So, I am thinking about hosting a Mother's Day contest. Basically, people write an essay about their mothers. I post the top 10 essays on my blog. The contestants get people to comment on their essay. The one with the most comments wins and they receive a really nice present! I like this idea for two reasons.

1) I think it would be a cool way to honor these mothers publicly on Mother's Day.
2) It would be great visibility for my blog.

I would also like to include something where they need to subscribe to my blog, but not sure how all that fits! SEE! I told you I'm a newby! Anyone out there willing to give some input?

Thanks in advance!

:o)Grace

Wednesday, February 20, 2013

Easter

Easter's on its way y'all and so is the bunny rabbit! What does Easter mean to you?


Tuesday, February 19, 2013

How to get your kids to eat veggies!


It's the question on every parents mind. How do I get my kids to eat vegetables? I tried everything! Cut them into tiny pieces, made colorful presentations on small plates and stood on my head at the dinner table.  Nothing worked!  UNTIL, my obsession with mason jar salads happened. Then poof! Magically, Both of my kids want and love salads now. Oh dear, I sound like an infomercial.  Sorry!  I'm so excited about this though. I say, "Realaaaaay"? Is that all it took? YES!  I'm so happy I stumbled upon this amazing thing that worked for our family. I hope it helps you too! Read below for the miracle!!!:o)  Mason Jar salads are easy to make and delicious!  For some reason, way more delicious than just putting together a bunch of veggies in a bowl and mixing them up.  I think it's the veggies working together in the sanctity of the jar environment!  The best part is, they preserve for about 5-7 days. If you are interested in the mason jar salads in detail, you can read about them here on my blog!  Anyway, let me get on with the rest of this story. I did exactly this:

1) Sat down with each child as if I were interviewing them. Made it official with a pen and pad!
2) Told them I needed a new salad recipe for my mason jar salads and I wanted to name it after them. They loved this part!  I will be posting their recipes on this blog soon!
3) I asked them what veggies, fruit or other items they would like to include? Furthermore, it would have to be something they would eat and stand behind if it was going to be a real recipe!  
4) The List: They made a list of of things they would like included in their salad.
5) We shopped together, washed the veggies, fruit and other items together, cut together and layered their mason jars! Put the cap on and placed them into the refrigerator.
6) I prayed they would love their creations! I honestly did this. I really wanted them to get something out of this exercise. I was somewhat skeptical since nothing I had ever done excited them enough to eat veggies. But guess what?

 They both ate their entire salads!

My little girl was so excited about her salad she wanted me to take a picture and told me to put it on my blog! Perfect I say!

:o)Grace


Our Deepest Fear

By Marianne Williamson

“Our deepest fear is not that we are inadequate. Our deepest fear is that we are powerful beyond measure. It is our light, not our darkness that most frightens us. We ask ourselves, Who am I to be brilliant, gorgeous, talented, fabulous? Actually, who are you not to be? You are a child of God. Your playing small does not serve the world. There is nothing enlightened about shrinking so that other people won't feel insecure around you. We are all meant to shine, as children do. We were born to make manifest the glory of God that is within us. It's not just in some of us; it's in everyone. And as we let our own light shine, we unconsciously give other people permission to do the same. As we are liberated from our own fear, our presence automatically liberates others.”


Monday, February 18, 2013

3 Steps To Cure Your Melasma!

Before I get into my own personal miracle with ridding myself of Melasma, I need to make a few things clear. I am not being paid by the companies who's products I am about to write about. The products referred to in this article are my personal products that I use every single day. A ton of research, trial, error and money on my part has gone into picking each and every one of them! This is my own personal cure and experience! Every one's skin is different!  This may or may not work for you. I say that because I have to say that.  I believe in these products and I do know this method worked for me and other people.  You can read the reviews yourself on the links I provided! I am really paranoid of being called out or sued based on my words so I am careful!  I am sure you understand! Ok... Let's get on with it! Shall we.:o)  My hope is, through reading this article, you gain some knowledge and find a solution to your Melasma.

First let's define Melasma. The brown blotchy stuff on your face that's made worse by sunlight and makes you feel ugly. Well, at least it made me feel ugly and self conscious!. My Melasma came after my daughter was born, in 2008. I guess that happens to many women after pregnancy and sometimes it goes away.  I however, was one of the lucky women it decided to take up permanent residence on! I was tired of waiting for it to go away on it's own, so I decided to cover it up with makeup. I spent about $400.00 on different products, trying to find the magic coverage. There just wasn't one.  Next, I tried Microdermabrasion. This worked really well.  But the cost at $100.00 per session, with at least two sessions per month wasn't something I could continue to afford.  I had to find another solution!

 So, Here is my personal cure!


Step 1 - Exfoliate, Exfoliate, Exfoliate!  Get all the dead skin cells off of your face!  The place where I was getting Microdermabrasion also recommended that I purchase a manual microdermabrasion for home in between treatments. I have watched people purchase some drug store kits that pale in comparison to this little bottle of pure bliss.  Bioelements Pumice Peel works by using a small amount of the product and rub it in circular motion all over your face.  Of course avoiding your eye area.  As the product starts to dry, keep rubbing in a circular motion until the product traps your dead skin and miraculously sloughs off all the dead skin cells on your face and they fall into the sink! I love it! How cool is that? You get to actually see those yucky old cells falling. Maybe I'm sick, but I like to know that a product I am using is working and that dead skin falling of, is the best evidence I could have! So YAY! Love it.

Step 2 - Get rid of the brown stuff!  My favorite step!
Obagi Nu-Derm, CLEAR Skin Bleaching & Corrector Cream.  This stuff is my lord and savior of skin care products.  It reduced my tears and brought back my self esteem.  Yes, that may sound a little pathetic.  But I was pathetic and desperately wanted my brown spots to fade!  It took about three weeks to see a major difference.  But for me this stuff started working within a few days!  I love this product.  I have to say, I didn't go to a dermatologist to get this product.  But you probably should!  This is the first product I use on my skin after washing and drying it.  I then moisturize and put a good sunblock on!  After all, the sun is what makes the condition worse! 

Step 3 - A good foundation!
Estee Lauder Double Wear  - Absolutely Amazing stuff.  It glides on well.  Gives a nice natural look with great coverage and stays put under many conditions!  I Love it.  I like to put it on with a makeup brush.  It works so much better than using your hands and goes on more evenly.  They aren't cheap, but work fabulously!  Get a good one!  I like Clinique's foundation application brush.  Below is a video of the before and after of foundation makeup application and the products I use!
 
Step 3 Foundation Application Video 


Tuesday, February 12, 2013

Greek Mason Jar Salad Recipe

Ok guys! This is a great tasting salad! It's so fresh and light! YUM. If you just happened upon this recipe and need more detailed information about the assembly of Mason Jar salads, there is a post dedicated to that very subject on my blog!

Have a super fantabulous day and go make this salad! You will absolutely love it and so will everyone you make it for!!!!:o)

Layer your ingredients in a quart size Mason Jar as follows:
-Dressing (recipe below)
-Garbanzo beans
-Red, yellow and green bell peppers
-Sliced black olives
-Sliced scallions
-Chopped roasted red peppers
-Chopped cucumber
-Cherry tomatoes
-Chopped Romain Lettuce

Dressing Ingredients:
-6 Tbsp Olive oil
-2 Tbsp Freshly squeezed lemon juice
-1 Tsp. Red wine vinegar
-1/2 Tsp. fresh garlic chopped
-1/2 Tsp. dried oregano

Other Ingredients:
-Feta cheese
-Croutons (crushed)
*When you serve this salad, put feta and crushed croutons over the top!

*Side note: I like to double or triple my salad dressing recipes and store them in a mason jar. that way if you would like it for later, it's already made and if you are making 12 salads at a time like I do, you have enough dressing!


Saturday, February 9, 2013

French toast sweet potatoes!

These are delicious and simple!

Ingredients:

Two sweet potatoes
One egg
1/4 cup milk
Salt and pepper
Parmesan cheese
Maple syrup
Tablespoon butter

Directions:

Slice sweet potatoes at about a quarter inch in thickness. Boil them in water until just about cooked. Take them out and let them cool. Create an egg wash with the egg and milk. Place the sweet potatoes into the egg wash. Take them out and place them flat onto a baking sheet or plate. Do not layer them. Sprinkle them with Parmesan cheese and salt and pepper to taste on one side only. Put your butter in the pan and melt it on medium high heat. When the pan is nice and hot, its time to place your sweet potatoes in the pan. You know the pan is at the right temperature if you hear the potato sizzle a bit when you place it in the pan. Fry them on both sides! Plate them with a drizzle of maple syrup and eat your heart out!

Wednesday, February 6, 2013

Confetti Mason Jar Salad Recipe

The best way to make this recipe is to get about 12 quart size mason jars, all of the ingredients and make them all at once. Yes! Your family has to love salads! But you have 5 days to eat them! If it's just you then do 6 jars and keep the left over ingredients! You will have to experiment with your family needs and the amount of jars you make!

Layer in a 1 quart size mason Jar:

Starting on the bottom and layer the following:

-Salad dressing - I use balsamic. Two or Three Tablespoons. This is your preference.
-Chickpeas
-Matchstick carrots
-Broccoli slaw
-Chopped mushrooms
-Sliced black olives
-Sliced cucumbers with skin on
-Green peppers, red peppers and yellow peppers - chopped
-A few roasted red peppers from a jar - chopped
-Cherry tomatoes (Do not chop)
-Lettuce - I like Artisan Lettuce - chopped

When you're finished layering the ingredients, put a small square of paper towel in the top of the jar to absorb the moisture while in the fridge, then screw on the lid.

When you're ready to serve, just shake it up. Yes, it will shake even though it's packed! But the beauty of this is, it will not disturb the layering of the salad.  It will simply distribute the salad dressing perfectly even throughout the salad. Pour the salad onto a large plate or bowl and you will have the most delicious tasting, most beautiful salad you have ever had! The veggies at the bottom lay over the lettuce in a way that makes you want to take a picture of your plate. Add shredded cheese and croutons if you like and your tummy will thank you!

Amazing!

Salad in Mason Jars!

I Love these delightful little jars filled with all the colorful salad peaking out! When I look at them, not only do I see a beautiful array of colors I like to call "salad art", I also see a jar full of delicious yummies, packed with nutrients! The first time I ate one of these creations I was so amazed with how different it tasted from any other salad I had made! I think it has to do with the layering and how it pours onto the plate. Honestly, most salads I've ever eaten paled in comparison. So, I urge you to go get these ingredients and create your own! Let me know how you like them! Some rules of thumb while making the salads;

1) Put the harder veggies at the bottom of the jar. I put salad dressing in the bottom, first and the denser veggies next. They can withstand the dressing and do not get mushy. Some examples of things I like to put in the bottom are cauliflower, carrots, broccoli slaw or chick peas.
2) Layer the salad and put the lettuce at the top.
3) Cut a paper towel in four sections and put one on top of the lettuce right before you screw the cap on. It helps aid in moisture removal from the jar which can help preserve the salad.
4) I like to buy the quart size mason jars. These make a big meal. The smaller mason jars would make a side salad.
5) Refrigerate the salad. They should last about 5 days. I read somewhere else 5-7. But not sure how they look at the seven day mark! Mine are always gone within three.
6) When you are ready to serve, shake it up a bit and just pour the salad onto a plate. The veggies and dressing in the bottom will fall beautifully over the salad!
7) Enjoy!